Table of Contents:
- The Best And Easiest Guide On How To Install WordPress
- Downloading the installation package
- Extracting the package and obtaining the data to upload to FTP
- Follow the steps below again:
- Prepare your FTP and MySQL login credentials
- The FTP server connection details should include:
- The MySQL database connection details should include:
- Install an FTP client for connecting to FTP
- The Best And Easiest Guide On How To Install WordPress
- Transferring folders from your computer to FTP
- We are now ready to start the WordPress installation
- First WordPress Setup
- Conclusion
- More content about WordPress
Last updated December 6th, 2023 00:10
A complete manual and guide on installing the WordPress content management system from the very beginning, including downloading the installation package, connecting to FTP, filling in all the necessary details, including MySQL, and finally logging in to the administration. The guide is designed step by step for absolute beginners. If you have no experience with installing WordPress, don’t know what FTP is or how to log in to it, you’re in the right place. So welcome to the best and easiest guide on how to install WordPress
The Best And Easiest Guide On How To Install WordPress
Downloading the installation package
Welcome to the WordPress installation guide, the most widely used content management system in the world for website creation. Here, you will learn how to go through the installation process from the very beginning with all the necessary details. I will also try to describe the installation in a way that anyone can understand. We will not delve into technical details or descriptions that might confuse an average user. I will guide you through the installation so that even a primary school student or a senior who is just learning to use a computer can handle it. Let’s get started.
The entire installation begins with downloading the data we will use to install WordPress. You can find the WordPress installation package at this link: https://wordpress.org. To download it, follow these steps (I will include screenshots throughout the process to ensure you don’t get lost):
- Open the above-mentioned page https://wordpress.org.
- In the top right corner, click on the “Get WordPress” button.
- On the next page that appears, click on the “Download & Install” link.
- On the new page, click on the “Download WordPress X.XX.X” button (where X will be replaced with the current version number available).
- Your browser will prompt you to download the package. Choose a folder on your computer and save the package there.
Extracting the package and obtaining the data to upload to FTP
The package containing the data to be uploaded to FTP is compressed in a .ZIP file format. It is compressed to make it smaller for downloading and also because WordPress itself contains several thousand files. Thanks to the .ZIP file, you will fortunately only need to download this one file. You won’t need anything to extract it because the Windows operating system can work with this file natively (natively here means that it is familiar with this file and can extract it without the need for additional programs).
Follow the steps below again:
- Open the folder where you downloaded the installation package.
- Double-click on the package, and it will open, showing you the data it contains (a folder named WordPress).
- Click on the “Extract All” icon.
- Use the “Extract” button.
- Do not modify the path; the package will be extracted to the same folder.
Prepare your FTP and MySQL login credentials
Now we move on to what you will absolutely need for the installation: the FTP server and MySQL database credentials. These will be provided to you by your web hosting provider. If you haven’t received them in a final message, please contact your web hosting provider and request these two pieces of information.
The FTP server connection details should include:
- Server name or its IP address
- FTP login
- FTP password
The MySQL database connection details should include:
- Database name
- Database login
- Database server name or its IP address (sometimes referred to as localhost, but this is not always the case)
- MySQL database password
Install an FTP client for connecting to FTP
For FTP connections, we will be using the FileZilla program in this guide. It is free and created by the same developers (or company) as the Firefox web browser. You can download the FileZilla FTP client from this link: https://filezilla-project.org/download.php?type=client

After downloading the program, install it like any other regular program in Windows. Keep FileZilla on your computer even after installing WordPress. Once you become more familiar with WordPress, you will find the FTP connection useful for solving various issues.
The Best And Easiest Guide On How To Install WordPress
Transferring folders from your computer to FTP
After installing the FileZilla FTP client, start the program through the Start menu and have your FTP login credentials ready, which you obtained from your web provider. Instead of describing how to connect, I will show you with an image, as it will be more comprehensible and easier to understand.
The FTP client will have two windows. In one window, you will see the data on your computer. Here, locate the folder where you have already extracted WordPress. In the second window, after logging in, you will see the data structure of your website. Each provider has a slightly different data structure. Typically, WordPress is uploaded to the “WWW” folder or the main folder where you log in. If you’re unsure about this, contact your web hosting provider to clarify the situation. If you have web hosting with Forpsi, use the “www” folder to upload WordPress.
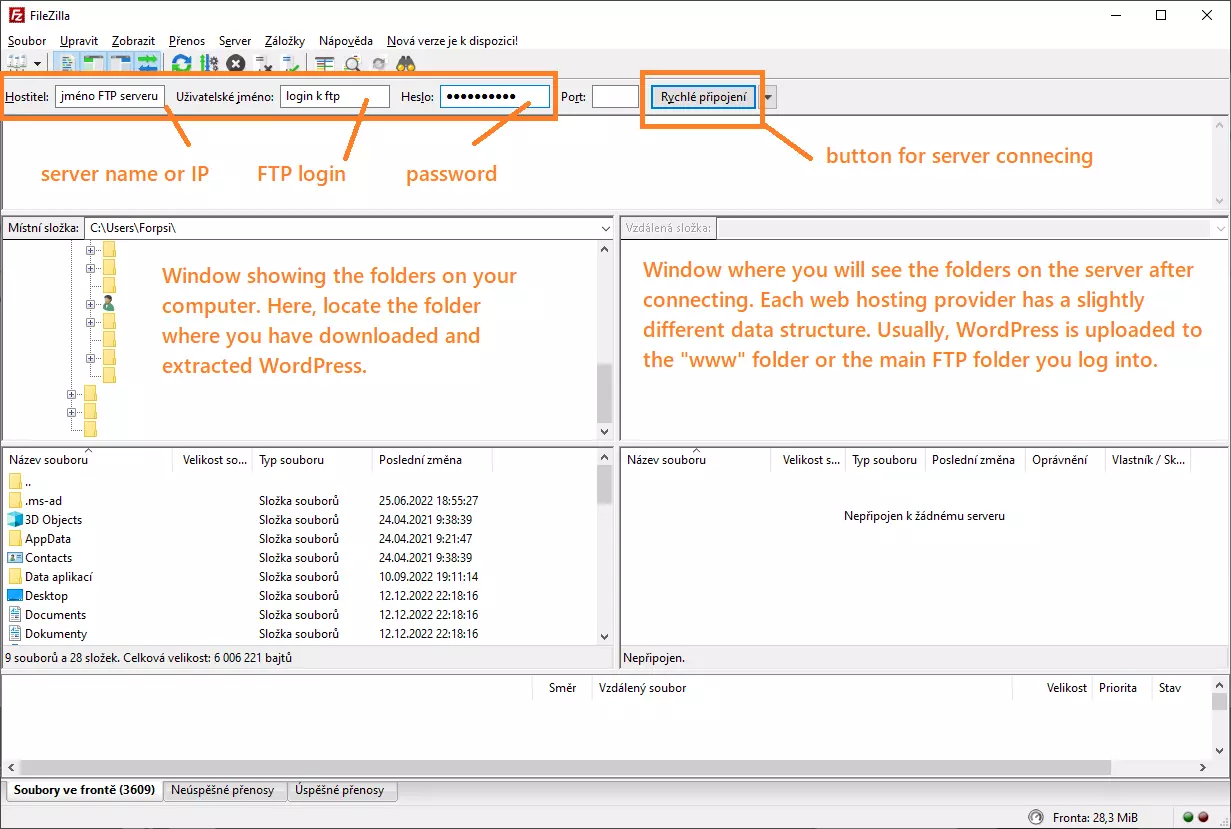
Now, move the folders from your computer to the FTP. In our case, the folder for website operations will be named “www”. The website used for creating this guide is hosted by Forpsi. Forpsi has a data structure where the folder for website data is indeed the mentioned “www” folder.
You can quickly select all files by using the CTRL+A keyboard shortcut. Once the files are selected, right-click and choose “Upload to server”. However, in the right window, don’t forget to open the “www” folder before doing so.
We are now ready to start the WordPress installation
For this, you will only need a web browser and the MySQL connection details. Open any web browser you use (Firefox, Chrome, Edge, Opera, etc.). Enter the domain name where you will be installing WordPress. The browser should display the beginning of the installation process. Click on the “Continue” button to proceed.
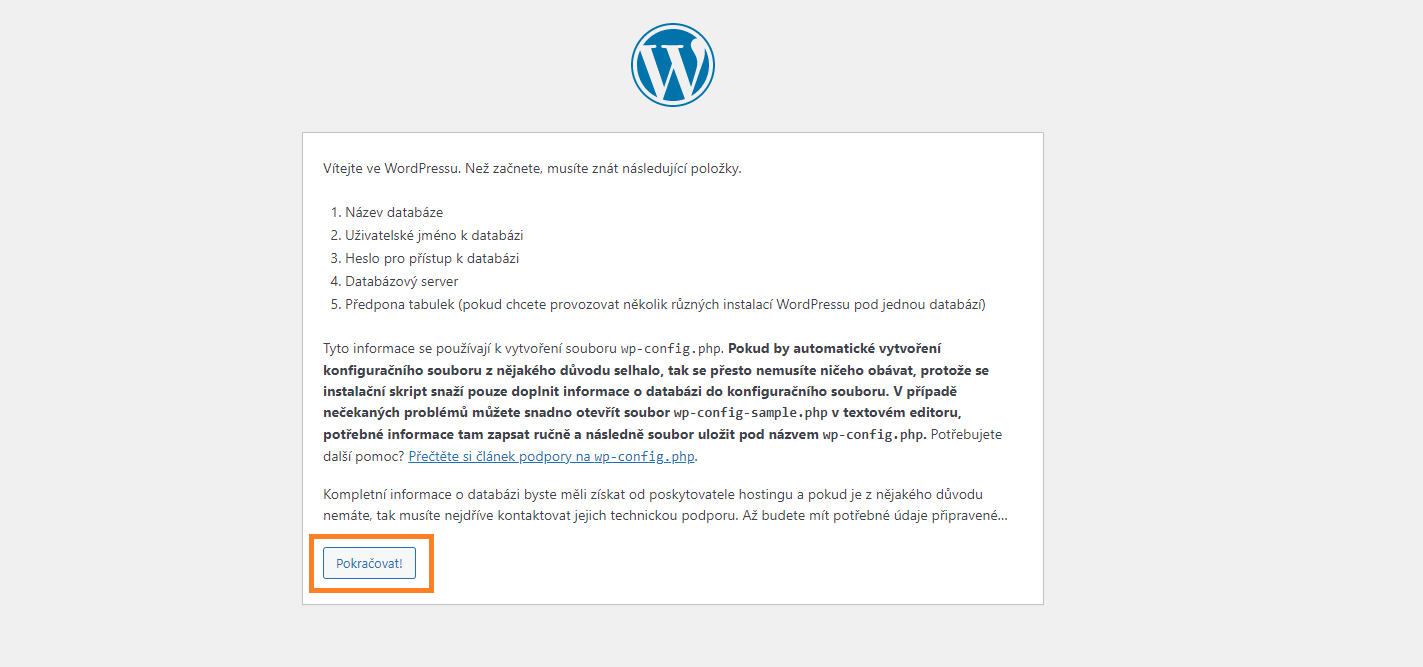
Now we come to the step where the installer will require your database connection details. Fill in the database name, username (database login), database server (note that it may not be localhost, especially with Forpsi), and password. Leave the table prefix as it is, without making any changes. This table prefix is used to differentiate between multiple WordPress installations within the same database. It ensures that each installation remains separate. After filling in all the information, click on the “Submit” button.
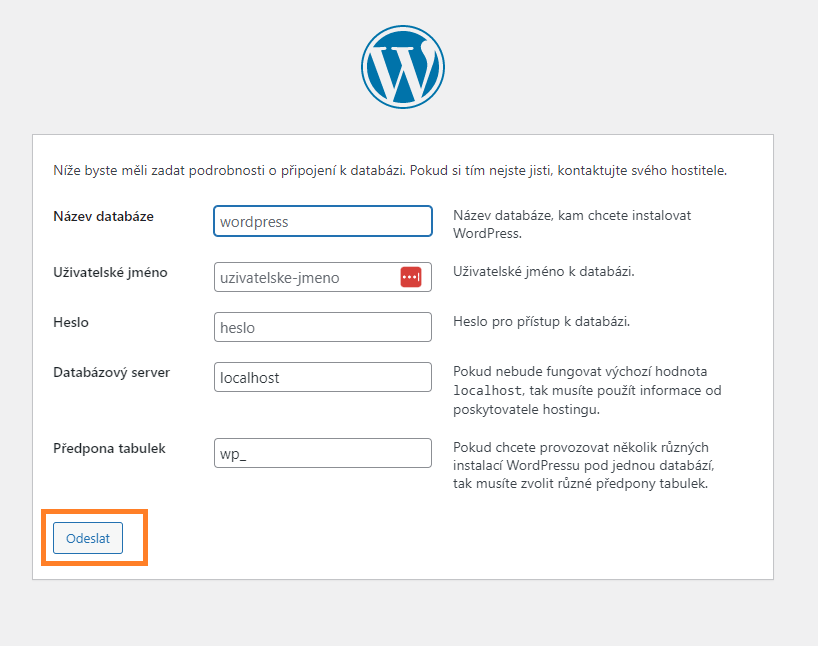
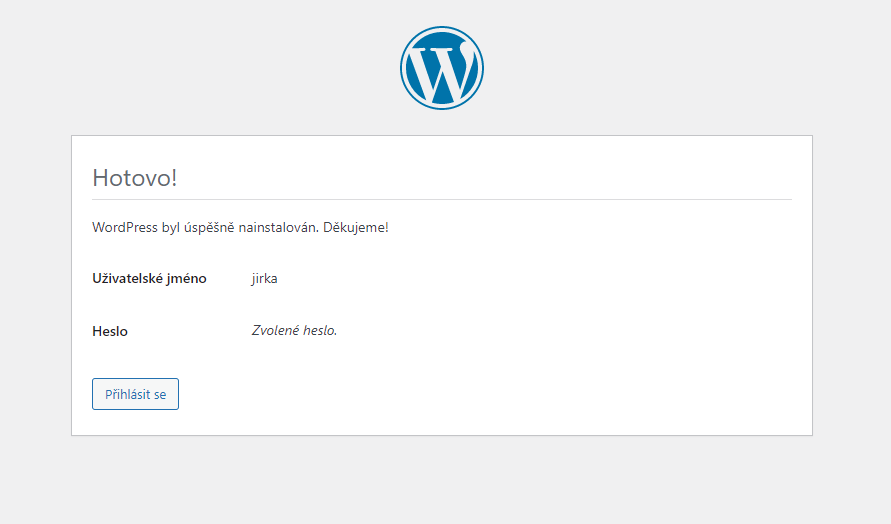
If you have filled in all the information correctly, the installer will congratulate you and offer an “Install” button. Click on it, and the installation process will begin.

First WordPress Setup
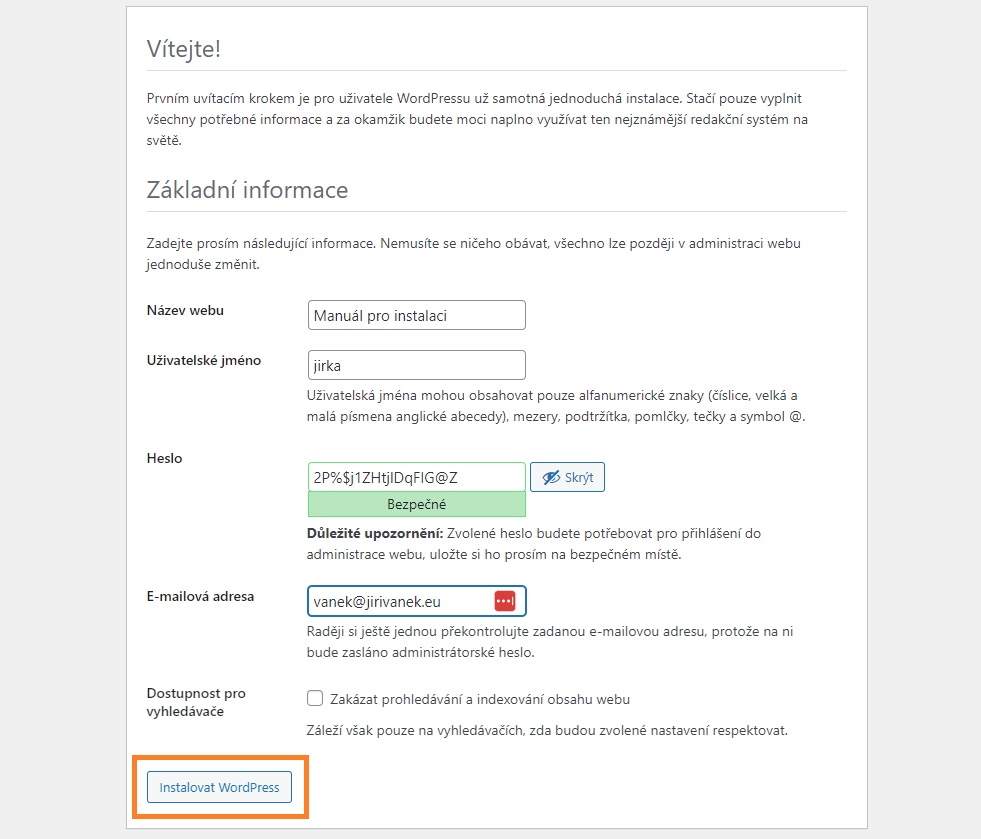
As part of the installation, you will also need to configure some initial settings for your website, such as:
- Website name
- Username (for security reasons, it is not recommended to choose “admin” as the username, as it makes it easier for potential attackers to attempt password breaches)
- Password (I recommend using a combination of characters and numbers; a password like “frantisek123” invites trouble)
- Email address
- Search engine visibility (you can enable it later from the administration panel if you choose to disable it now)
Conclusion
You have successfully installed WordPress and can now start using it. The administration panel is always accessible at the address yourdomain.extension/wp-admin. There, you will enter your chosen username and password during the installation process. Once logged in, WordPress will redirect you to the administration area where you can begin working on your website. I wish you the best of luck in creating your website or blog. You may find additional beginner’s guides on these pages that will focus on WordPress-related topics.
Please note that this installation guide was written on December 13, 2022.
The website is created with care for the included information. I strive to provide high-quality and useful content that helps or inspires others. If you are satisfied with my work and would like to support me, you can do so through simple options.
Byl pro Vás tento článek užitečný?
Klikni na počet hvězd pro hlasování.
Průměrné hodnocení. 0 / 5. Počet hlasování: 0
Zatím nehodnoceno! Buďte první
Je mi líto, že pro Vás nebyl článek užitečný.
Jak mohu vylepšit článek?
Řekněte mi, jak jej mohu zlepšit.

Subscribe to the Newsletter
Stay informed! Join our newsletter subscription and be the first to receive the latest information directly to your email inbox. Follow updates, exclusive events, and inspiring content, all delivered straight to your email.
Are you interested in the WordPress content management system? Then you’ll definitely be interested in its security as well. Below, you’ll find a complete WordPress security guide available for free.

