
Table of Contents:
- Installation and configuration of Apache on Ubuntu 20.04
- System Update
- Apache Installation
- Firewall Configuration
- Installation and Configuration of Apache on Ubuntu 20.04
- Apache Configuration
- Setting up Apache Virtual Hosts
- Insert the index file into the folder
- Create a virtual host
- Activate your new virtual host
- Installation and configuration of Apache on Ubuntu 20.04
- Conclusion
Last updated January 24th, 2024 09:54
If you want to run web hosting on your own server, you will need to set up a web server as a minimum requirement. Since Apache is widely popular and commonly used, let’s take a look at how to install and configure Apache on Ubuntu 20.04. The installation and configuration process is not complicated, and you just need to follow the steps precisely. If possible, it’s recommended to take a snapshot of your server or create a backup before the installation, so you can revert back to the original state if needed.
Installation and configuration of Apache on Ubuntu 20.04
System Update
As the first step in installing Apache, we will update the Ubuntu system repositories. Log in to your server as an administrator via SSH and enter this command.
sudo apt update
The second part of the command, "apt," stands for "Advanced Packaging Tool" and is the package manager in Ubuntu. It allows us to install, update, and remove software on our system.
The last part of the command, "update," is one of the many available actions we can perform with the "apt" package manager. Specifically, this action is used to download the list of available software package updates from the official Ubuntu repositories.
When you run the command "sudo apt update," the system connects to the internet and communicates with servers that maintain the package lists. The system checks for any updates to the packages you have installed and retrieves information about new software versions.
After completing the update of the package list, the system will display a message indicating how many packages are available for download and how many of them are updates. By running this command, you have obtained the latest information about available software, but the actual software update has not been performed yet.
To perform the actual software update on your system, you can use the command "sudo apt upgrade" or "sudo apt full-upgrade." These commands ensure that all available updates are installed on your system.
Apache Installation
Now you can proceed with the installation of the Apache web server itself. To do this, type and execute the following command in the terminal:
sudo apt install apache2
After entering the command, the system will prompt you to confirm the installation. You can confirm the installation by pressing the letter Y (for yes) on your keyboard and then pressing the Enter key. The system will then proceed to install Apache. Once the installation is successfully completed, you can check the Apache version using the command:
apache2 -version
As the output of this command, the system will display the currently installed version of your web server.
Firewall Configuration
I assume that you have the firewall (UFW) enabled and active on your server. If so, you need to modify the firewall to allow Apache to be accessible from the internet. You can add rules for Apache to the firewall using the following command:
sudo ufw allow ‘Apache’
This command will allow Apache for HTTP port 80 and HTTPS port 443 on the firewall from all over the world. It is not restricted to specific IP addresses. You can verify if you have added the rules correctly using the following command:
sudo ufw status
This command will show you the currently added rules on the firewall. In the “Available applications” list, you should now see Apache listed as available.
Installation and Configuration of Apache on Ubuntu 20.04
Apache Configuration
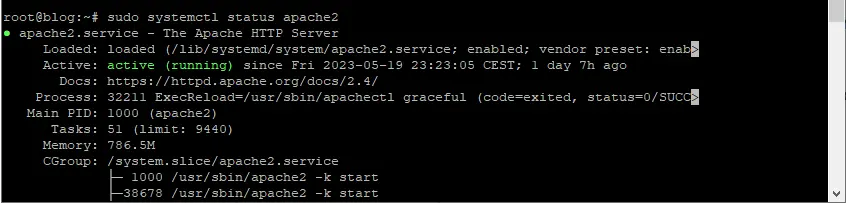
As the first step, verify that Apache is indeed installed on the server and that it is running. You can do this with the command:
sudo systemctl status apache2
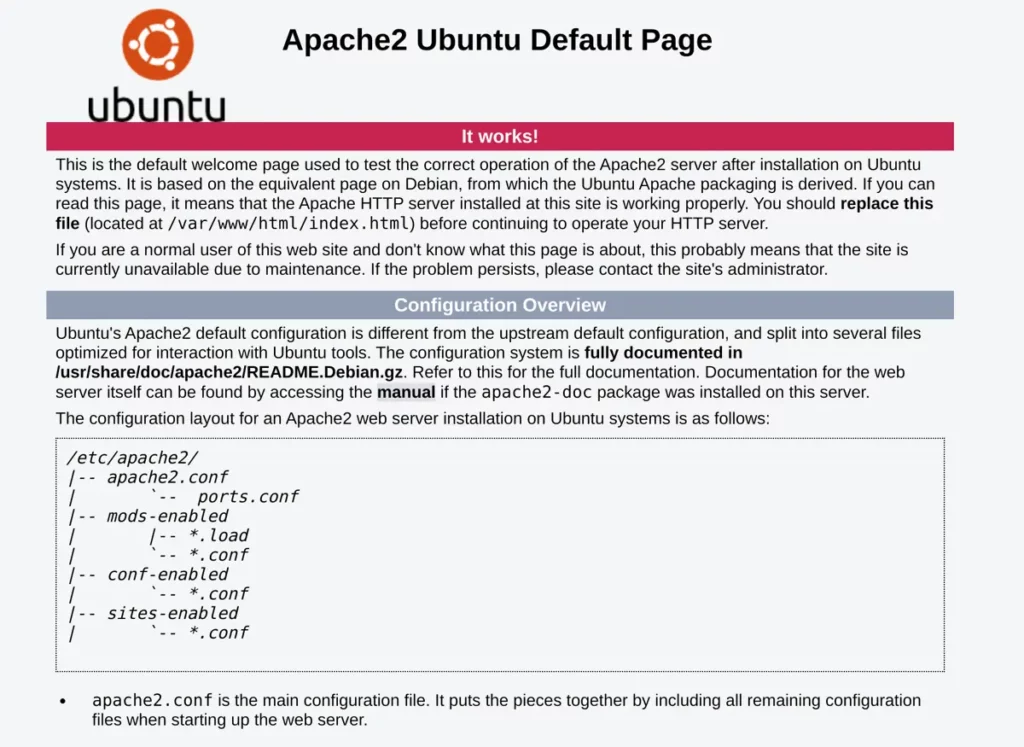
The response will be the service output, indicating its status, whether it is “active” or “inactive.” Additionally, if you enter the IP address of your server in a web browser now, you should see the welcome screen of the newly installed Apache web server. This can serve as an indicator that Apache is running correctly on your server.
Setting up Apache Virtual Hosts
If you are hosting multiple websites on your server, each website will have its own virtual host. The virtual host tells the web server which domain it manages, where the domain’s root folder with data is located, and may also include additional rules such as allowing the .htaccess file or specifying the path to SSL certificates.
As the first step, create a root folder for your first domain. In our example, we will use the test domain “info.cz.” Make sure to modify the commands with your own domain. Now, create the “www” folder for the “info.net” domain using the command “mkdir”:
sudo mkdir -p /var/www/info.cz/www
Change the owner of the folder to the current user by executing the following command:
sudo chown -R $USER:$USER /var/www/info.cz/www
At the same time, set the appropriate permissions for the folder to 755 by executing the following command:
sudo chmod -R 755 /var/www/info.cz
Insert the index file into the folder
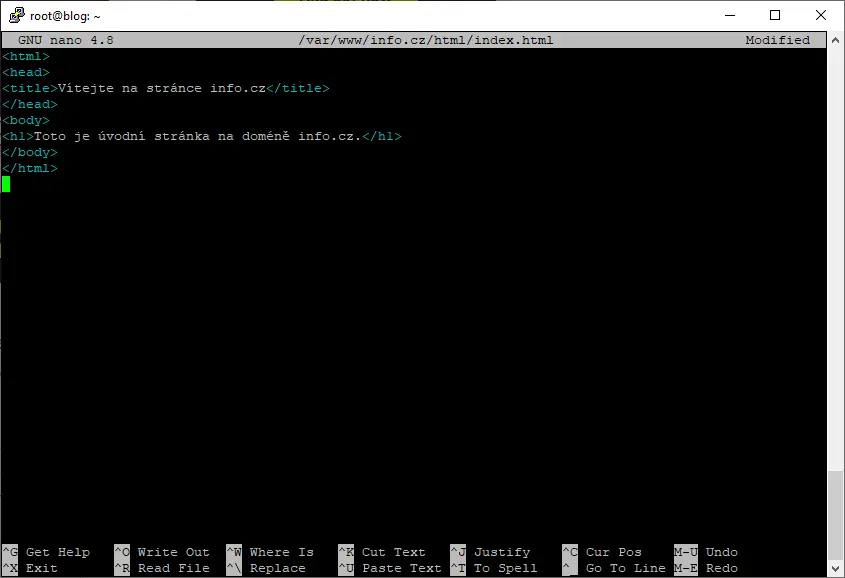
In order to display the first test file under the new domain, create an index.html file and insert a quick informative code into it, which will be displayed after configuring it under the domain. At least until you upload the website data to the folder. Use your favorite text editor for this task. In our example, we will use the nano editor.
nano /var/www/info.cz/www/index.html
Insert the following code into the file, then press the key combination CTRL+X, confirm the change by pressing the Y key, and then press Enter.
					<html>
<head>
<title>Welcome to info.cz page!</title>
</head>
<body>
<h1>This is the homepage on the domain info.cz.</h1>
</body>
</html>
Create a virtual host
Now, using the following command, you will create a virtual host for your new domain info.cz.
sudo nano /etc/apache2/sites-available/info.cz.conf
Insert the following code into the newly created virtual host using the nano editor, as mentioned in the previous command:
					<VirtualHost *:80>
ServerAdmin admin@info.cz
ServerName info.cz
ServerAlias www.info.cz
DocumentRoot /var/www/info.cz/www
ErrorLog ${APACHE_LOG_DIR}/error.log
CustomLog ${APACHE_LOG_DIR}/access.log combined
</VirtualHost>
Adjust the details such as the administrator’s email, actual domain name, and the path to the root directory according to your real data. As evident from the code, this virtual host is specifically for port 80, which is the port for HTTP communication. Therefore, it is currently unencrypted communication without an SSL certificate. We will discuss how to create an SSL certificate using Certbot in another article. Save the code and file again using the keyboard shortcut CTRL+X, confirm the saving with the letter Y, and press the Enter key.
Activate your new virtual host
You have created the first virtual host and now you need to activate it. You can do this with the following command:
sudo a2ensite info.cz.conf
At the same time, deactivate the original and default virtual host 000-default.conf.
sudo a2dissite 000-default.conf
Now restart Apache to load the new configuration:
sudo systemctl restart apache2
To check if everything is fine and without errors, you can use the command below. The expected response should be “Syntax OK”.
sudo apache2ctl configtest
If you have followed the instructions and have your domain properly directed to your server using an A record and the server’s IP address, you should now see your index file when entering the domain in your browser, located in the /var/www/info.cz/www directory.
Installation and configuration of Apache on Ubuntu 20.04
Conclusion
That’s all you need to do to set up a web server and host your first website on the server. In conclusion, I will provide you with some important commands for managing Apache. They will come in handy.
- Start Apache – sudo systemctl start apache2
- Stop Apache – sudo systemctl stop apache2
- Reload Apache – sudo systemctl reload apache2
- Disable Apache – sudo systemctl disable apache2
- Restart Apache – sudo systemctl restart apache2
Restart (command "sudo service apache2 restart" or "sudo systemctl restart apache2"): The "restart" command stops and starts the Apache server again. When using this command, all running Apache processes are terminated, and then a new Apache process is started with the updated configuration. Restart is useful when making significant changes to the configuration or modifications that require the server to be completely stopped and started again. During a restart, all traffic to the websites is temporarily interrupted as client connections are terminated and need to be reestablished.
The website is created with care for the included information. I strive to provide high-quality and useful content that helps or inspires others. If you are satisfied with my work and would like to support me, you can do so through simple options.
Byl pro Vás tento článek užitečný?
Klikni na počet hvězd pro hlasování.
Průměrné hodnocení. 0 / 5. Počet hlasování: 0
Zatím nehodnoceno! Buďte první
Je mi líto, že pro Vás nebyl článek užitečný.
Jak mohu vylepšit článek?
Řekněte mi, jak jej mohu zlepšit.

Subscribe to the Newsletter
Stay informed! Join our newsletter subscription and be the first to receive the latest information directly to your email inbox. Follow updates, exclusive events, and inspiring content, all delivered straight to your email.
Are you interested in the WordPress content management system? Then you’ll definitely be interested in its security as well. Below, you’ll find a complete WordPress security guide available for free.