Table of Contents:
- What is Debug Mode in WordPress?
- How to Enable Debug Mode and Debug Log in WordPress
- Another constants related to debug mode
- WP_DEBUG_DISPLAY
- SCRIPT_DEBUG
- How to enable debug mode and debug log in WordPress – Conclusion
- More content about WordPress
Last updated December 6th, 2023 05:52
If you own a website built on WordPress, you have probably experienced situations when a plugin or the content management system didn’t work correctly. This situation happens often, and it can be helpful to look under the hood of the errors that WordPress generates. To make it easier to identify the error, WordPress has a tool called debug mode. By enabling this feature, you can more easily find errors. Also, with the option to turn on logging, get a final output of error messages that you can use to begin troubleshooting. In this article, I will show you how to enable debug mode and debug log in WordPress. It will be easier for you to find and fix problems.
What is Debug Mode in WordPress?
Debug mode is a feature that allows developers to quickly find and fix errors on the site. After activating this functionality, detailed information about errors and warnings will appear on the page. It could be PHP errors or database problems. At the same time, you can also set the logging level to get more information about these errors. Than you can better understand what is causing problems on the page.
Debug mode is also very useful in website development and debugging specific functions. Thanks to it, you can have a great overview of how the system and plugins behave, whether they generate errors, or behave correctly.
How to Enable Debug Mode and Debug Log in WordPress
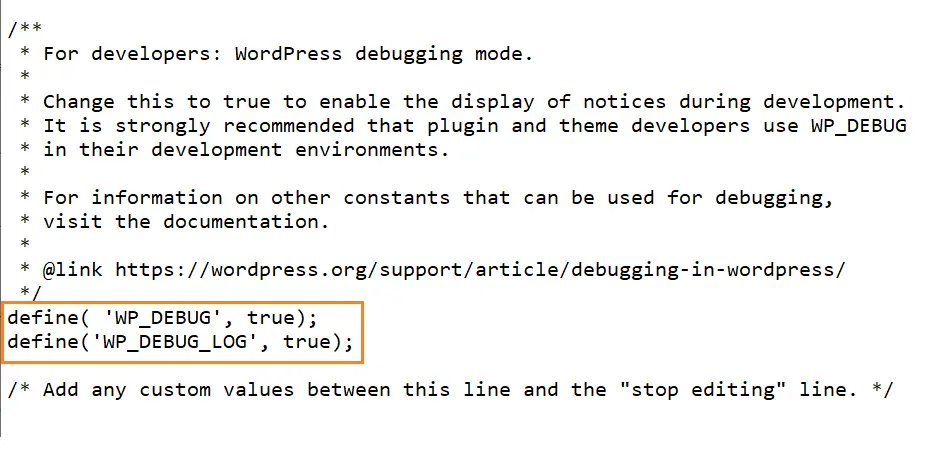
Enabling the debug mode in WordPress is a simple process that involves making a small modification to the wp-config.php configuration file. This file is usually accessible via FTP and is located in the root directory of your website. Here’s how you can do it:
define('WP_DEBUG', false);
- change the value from false to true.
define('WP_DEBUG', true);
In a similar way, you can also enable logging. By default, logging is neither enabled nor inserted in the configuration file. To enable logging, add the following code:
define('WP_DEBUG_LOG', true);
Similarly, to enable logging, which is not enabled by default and is not included in the configuration file, copy and paste this code on the next line after the debug mode is enabled. With logging enabled, not only will you be able to see the errors, but also a text file with a complete error log will be created on the FTP. You can use this file, for example, to attach it to an email and send it to your web developer, or to send it to the developer of the plugin causing the problem (of course, with additional descriptive information).

Another constants related to debug mode
WP_DEBUG_DISPLAY
WP_DEBUG_DISPLAY is a WordPress function that determines whether error messages are displayed on the screen or hidden. If this function is enabled, error messages will be displayed on the screen, which can be useful for developing and debugging pages. If the function is deactivated, error messages will be hidden and users will not see them.
Disabled WP_DEBUG_DISPLAY
define('WP_DEBUG_DISPLAY', false);
Enabled WP_DEBUG_DISPLAY
define('WP_DEBUG_DISPLAY', true);
SCRIPT_DEBUG
SCRIPT_DEBUG is a function in WordPress that determines whether the minified or full version of scripts will be used. If this function is activated, the full version of scripts will be used, which can be useful for development and debugging because it allows for better readability and understanding of the code. If the function is deactivated, the minified version of scripts will be used, which means the code will be shortened and optimized for faster page loading.
SCRIPT_DEBUG turned off
define('SCRIPT_DEBUG', false);
SCRIPT_DEBUG turned on
define('SCRIPT_DEBUG', true);
How to enable debug mode and debug log in WordPress – Conclusion
In today’s article, we have demonstrated how to enable debug mode and debug log in WordPress. Both constants are very useful during website development as well as during its usage, especially when system errors occur that would otherwise be difficult to detect. Modifying the configuration file can be done by practically anyone who has seen WordPress data on FTP at least once. Therefore, if you encounter a problem with your system or notice incorrect behavior, be sure to try enabling debug mode and debug log. It can give you a lot of insight.
The website is created with care for the included information. I strive to provide high-quality and useful content that helps or inspires others. If you are satisfied with my work and would like to support me, you can do so through simple options.
Byl pro Vás tento článek užitečný?
Klikni na počet hvězd pro hlasování.
Průměrné hodnocení. 0 / 5. Počet hlasování: 0
Zatím nehodnoceno! Buďte první
Je mi líto, že pro Vás nebyl článek užitečný.
Jak mohu vylepšit článek?
Řekněte mi, jak jej mohu zlepšit.

Subscribe to the Newsletter
Stay informed! Join our newsletter subscription and be the first to receive the latest information directly to your email inbox. Follow updates, exclusive events, and inspiring content, all delivered straight to your email.
Are you interested in the WordPress content management system? Then you’ll definitely be interested in its security as well. Below, you’ll find a complete WordPress security guide available for free.

