
Table of Contents:
- Tips and tricks for Elementor #2
- 1.) Maintenance mode
- 2.) Elementor Navigator
- Tips and tricks for Elementor #2
- 3.) How to customize the screen navigator
- 4.) Favorite widgets
- 5.) Creating Anchors
- Anchor using Anchor menu
- Anchor using CSS ID section
- More articles about Elementor
Last updated December 6th, 2023 06:25
Elementor is becoming an increasingly popular website editor built on the WordPress content management system. Elementor, both in its PRO and free version, contains various features that are not, or minimally, visible at first glance. In the following series of tips and tricks for Elementor #2, I would like to take a closer look at some of them and show them through examples in a series format. Let’s get started.
Tips and tricks for Elementor #2
1.) Maintenance mode
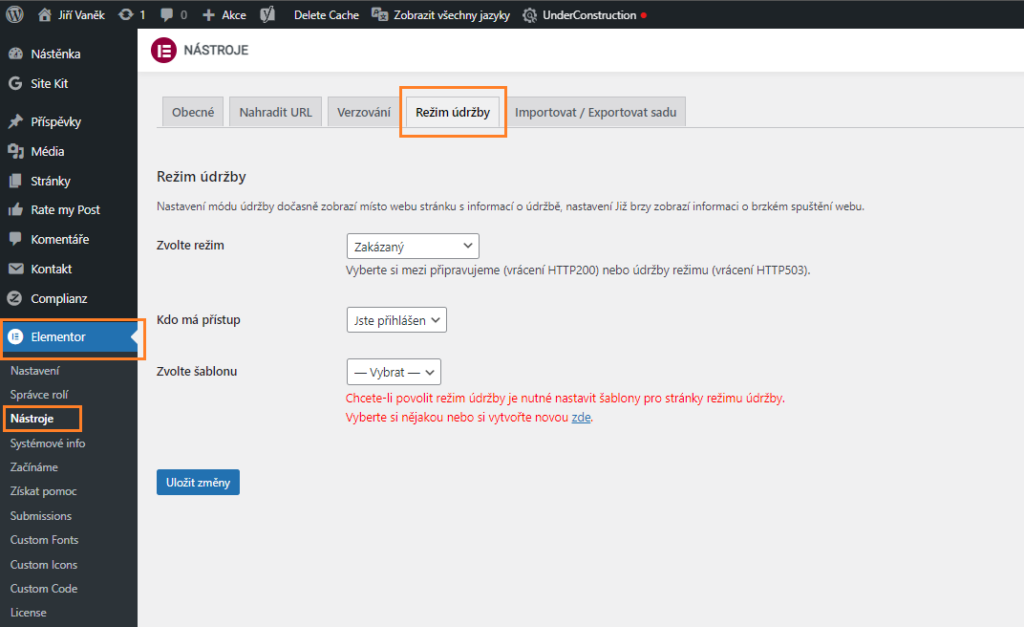
Many people use an external plugin for maintenance mode. But what is maintenance mode? If you are making changes to your website, whether they are graphic or technical, it is usually undesirable for the website to be running in full operation at that time. This is because visitors may encounter errors caused by the updates and the updates can also affect the website in an undesirable way. At that point, it is appropriate to switch the website to maintenance mode, where visitors will only see an informative message indicating that the website is being updated and when it will be back in operation. However, for the logged-in website administrator, the website is fully available and visible. And yes, if you have Elementor, even in the basic, unpaid version, you can do this. You can easily enable maintenance mode by following these steps:
- Click on the Elementor item in the left menu
- From the Elementor menu, select “Tools“
- Move to the “Maintenance Mode” tab
Here, you can choose the information that the user will receive, who will see the website (or in what user role), or you can create a template with the information that will be displayed to the website visitors. You can create a template with the information right from this page.
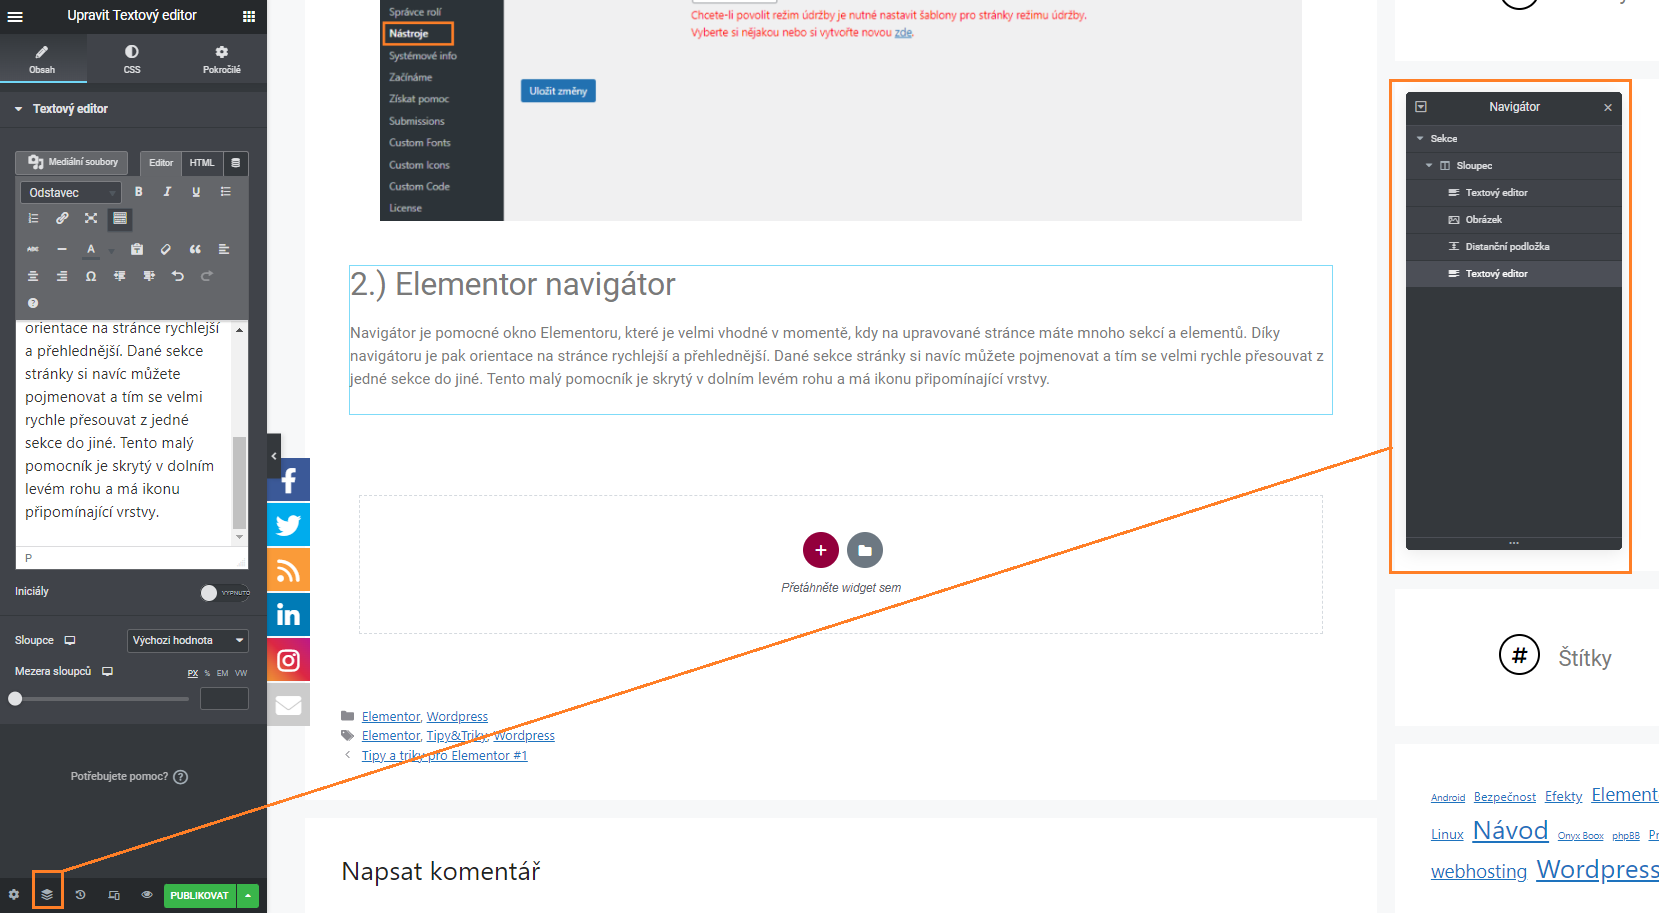
2.) Elementor Navigator
The Navigator is a helpful Elementor window that is very useful when you have many sections and elements on the page you are editing. Thanks to the Navigator, orientation on the page becomes faster and clearer. You can also name the sections of the page and easily move from one section to another. This little helper is hidden in the lower left corner and has an icon resembling layers.
Tips and tricks for Elementor #2
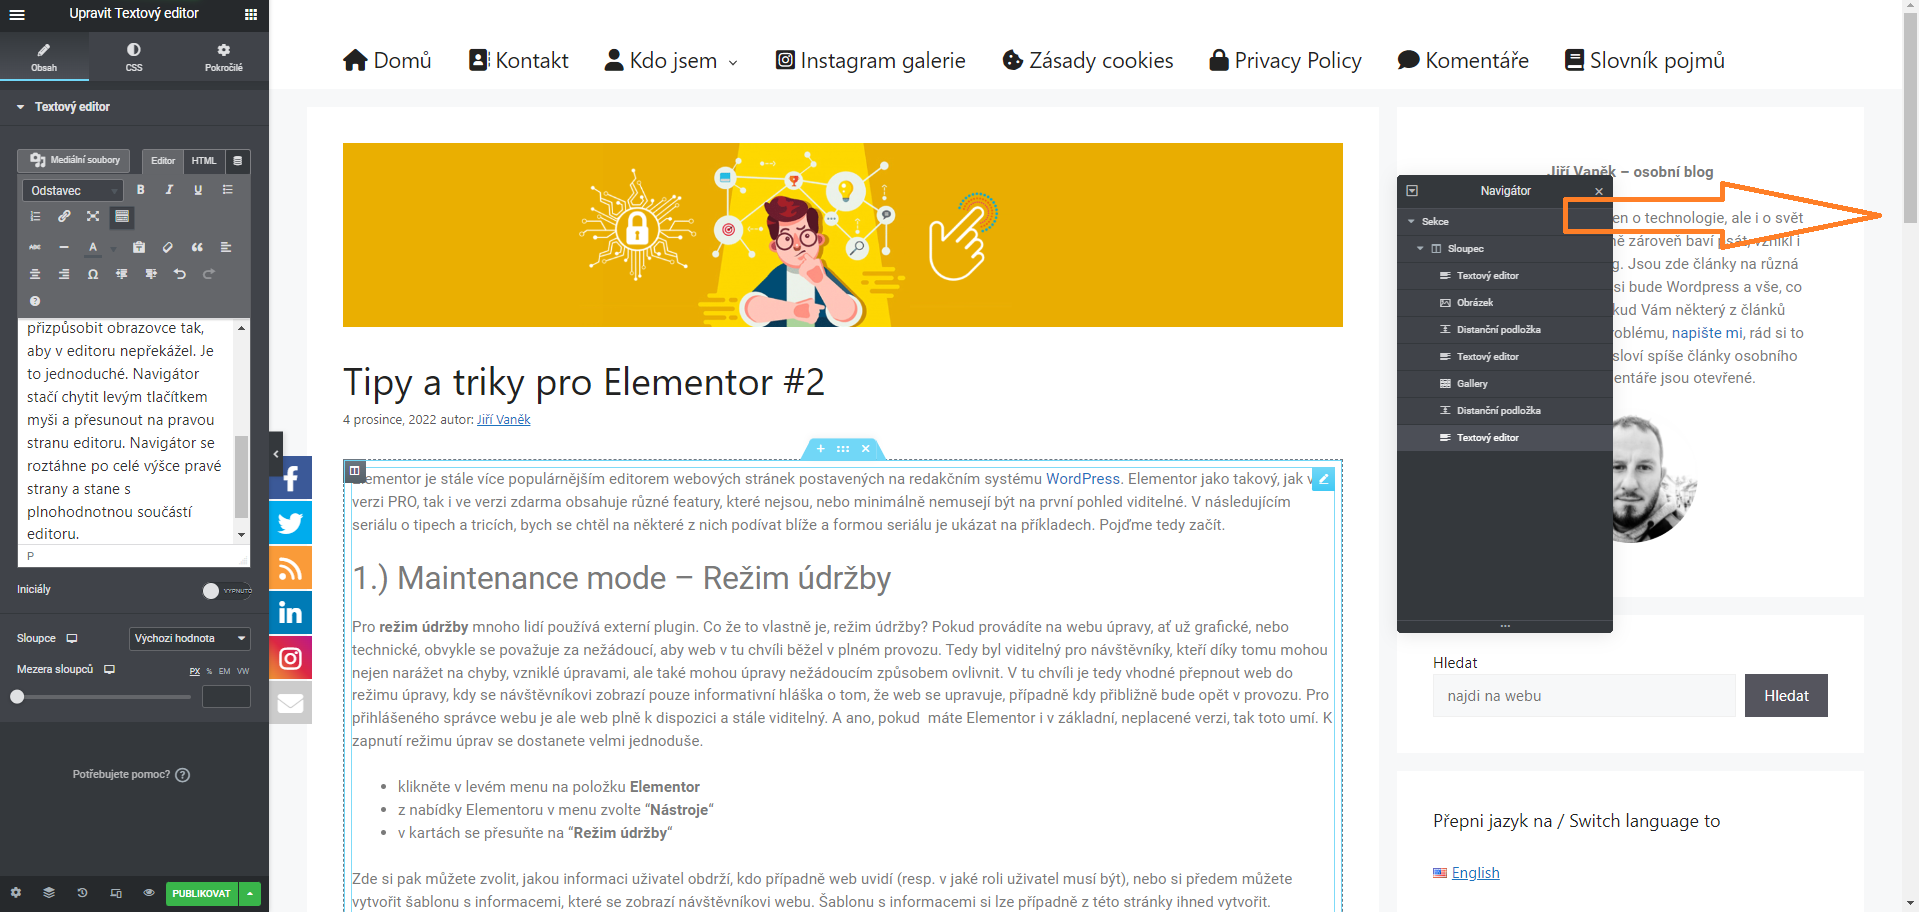
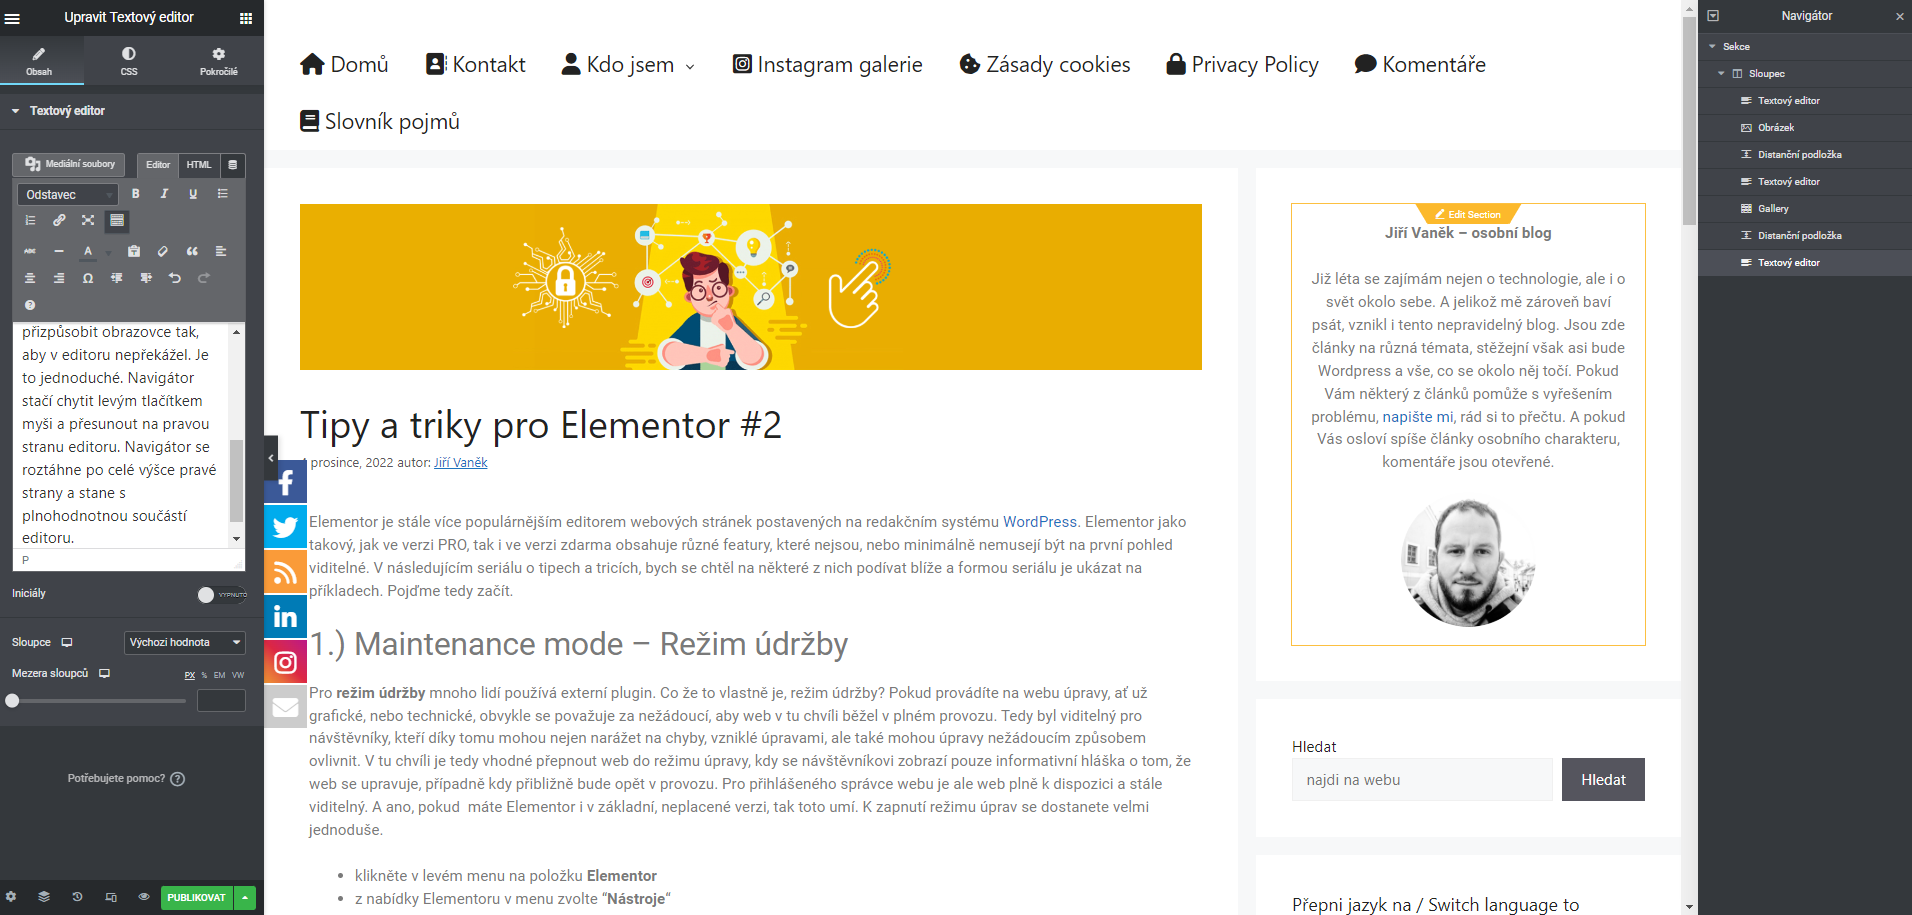
3.) How to customize the screen navigator
Referring to point two, where I showed you how to open the Elementor Navigator, I can give you another tip on how to easily customize the screen so that it does not interfere with the editor. It’s simple. Just click and hold the left mouse button on the Navigator and drag it to the right side of the editor. The Navigator will expand to the full height of the right side and become a full-fledged part of the editor.
4.) Favorite widgets
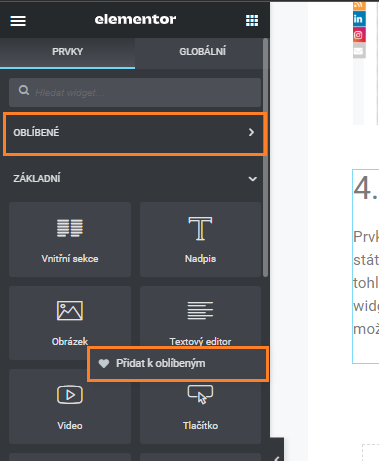
Elements in Elementor, such as text, image, separator, or gallery, are available in the left menu. We call them widgets. If you use a particular widget very often, it may be located at the end or in the middle of the widget menu. This means that you have to scroll to find it every time you need it. Elementor has thought of this too. Each frequently used widget can be saved as a favorite, making it much more accessible. To save a widget as a favorite, simply right-click on it and select “Add to Favorites“. This way, the widget will be saved in your favorites and be quickly accessible.
5.) Creating Anchors
First, let’s talk a little bit about what an anchor is. I’ll try to describe this function in a simple way. An anchor is a marker on a webpage that allows users to navigate to a specific location on the page via a hyperlink. It is commonly used on single-page websites in the navigation menu. Here’s an example:
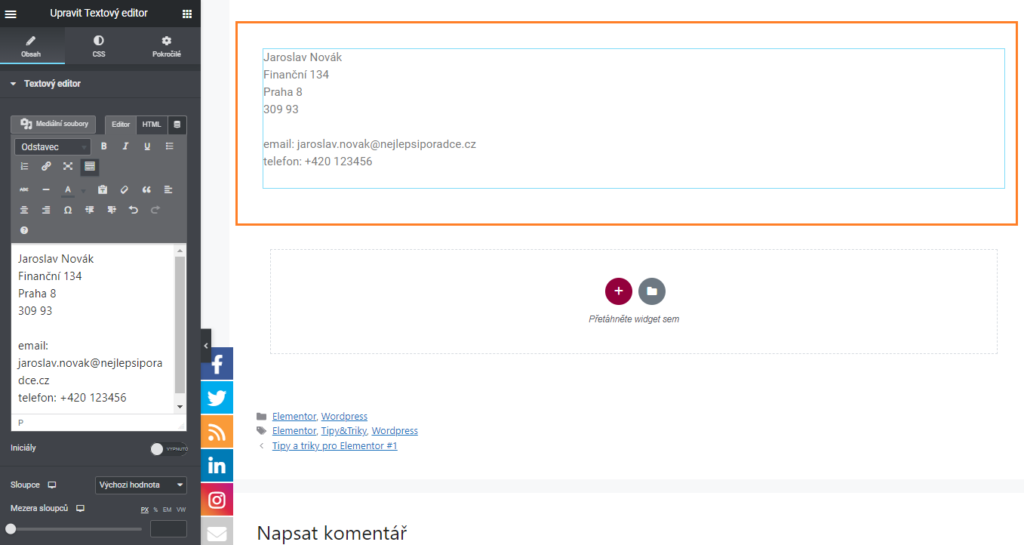
Let’s say we have a single-page website for a financial advisor’s personal portfolio. The header menu includes the options “About Me“, “Services“, “Pricing“, and “Contact“. The website will have only one page, and all of this information will be written on that page. Your task is to make it so that if someone clicks on “Contact” in the menu, the page will scroll down to the section containing the contact information. But how can you do this if there is no separate page for the contact information? The answer is by using an anchor. We will add an anchor to the contact section, which will have its own unique ID. We will then use this ID to create a hyperlink, as shown below.
First, we will create the contact information using the text widget.
Anchor using Anchor menu
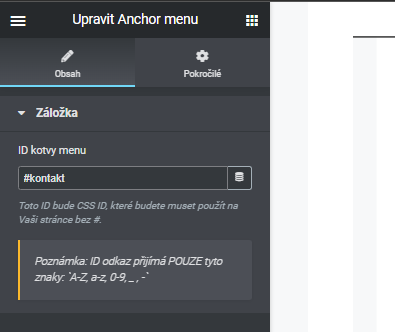
Now we want the web page to scroll directly to the section with contact information when the user clicks on the link in the top menu. To do this, we will create an anchor in the block where the contact information is located. We can find the anchor widget in the Elementor widget menu under the name “Anchor menu”.
In the next step, we’ll name this anchor using the # symbol (keyboard shortcut ALT+X). For our example, we’ll use #contact. If you later use this anchor and create a link in the top menu as https://bestadvisor.com/#contact, clicking on such a link will do exactly what we requested. The browser will automatically scroll down to the part of the page where we have placed the anchor with this ID, and the visitor will see the section of the page that contains the contact information for our financial advisor
Anchor using CSS ID section
The second way to use anchors in Elementor is through CSS ID section. I will use the same example as above. Again, I will need to use a link to the contact information in the menu. However, this contact will be in a separate section.
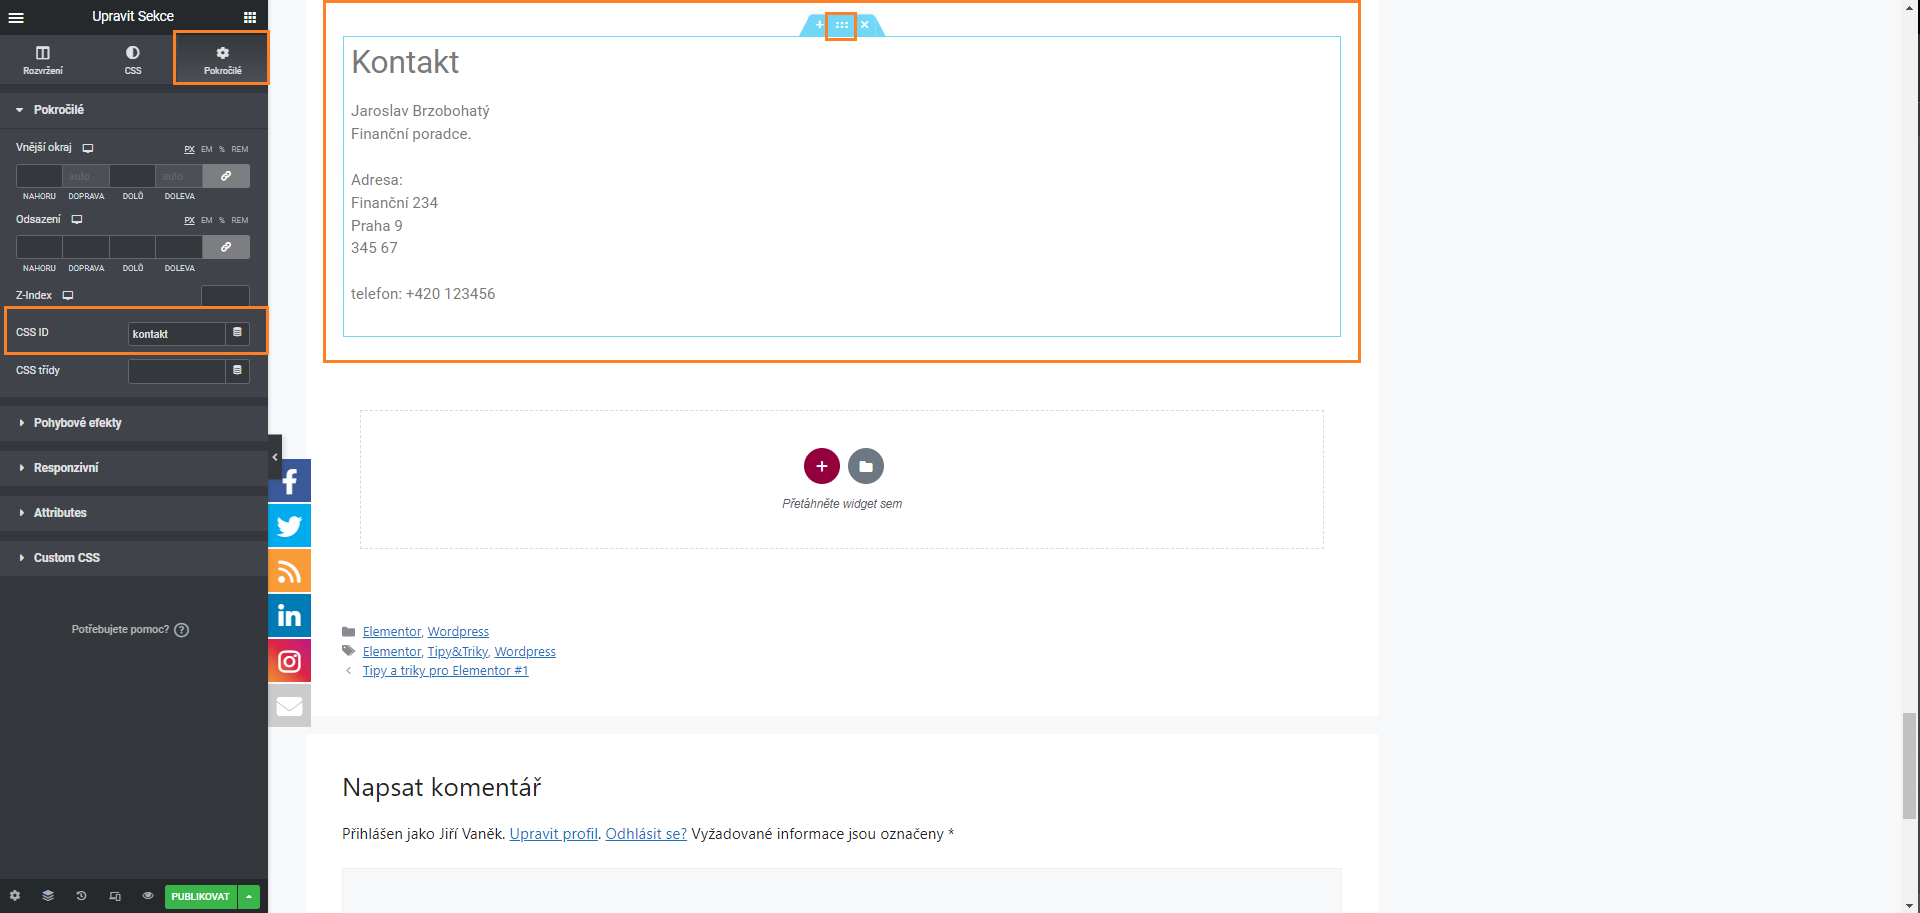
Here, I do not need to use the “Anchor menu” widget, but I can use a CSS ID to name the entire section, which, for our example, should contain nothing else but contact information for our financial advisor.
Here’s how you proceed:
- Click on the section to edit it.
- Click on the “Advanced” button.
- Enter “contact” in the CSS ID field.
In this way, the link https://bestadvisor.com/#contact will behave exactly the same as in the previous case, where we used the “Anchor menu” widget.
Thanks to this, you will be able to easily create one-page websites or business cards using the top menu as a navigator to individual sections with information.
The website is created with care for the included information. I strive to provide high-quality and useful content that helps or inspires others. If you are satisfied with my work and would like to support me, you can do so through simple options.
Byl pro Vás tento článek užitečný?
Klikni na počet hvězd pro hlasování.
Průměrné hodnocení. 0 / 5. Počet hlasování: 0
Zatím nehodnoceno! Buďte první
Je mi líto, že pro Vás nebyl článek užitečný.
Jak mohu vylepšit článek?
Řekněte mi, jak jej mohu zlepšit.

Subscribe to the Newsletter
Stay informed! Join our newsletter subscription and be the first to receive the latest information directly to your email inbox. Follow updates, exclusive events, and inspiring content, all delivered straight to your email.
Are you interested in the WordPress content management system? Then you’ll definitely be interested in its security as well. Below, you’ll find a complete WordPress security guide available for free.
