
Table of Contents:
- 1.) Dark and Light Interface Themes
- 2.) How to Place Buttons Side by Side
- 3.) How to Decrease or Increase Gaps Between Widgets
- More articles about Elementor
Last updated December 6th, 2023 00:01
Elementor is an increasingly popular website editor built on the WordPress content management system. Elementor, both in its PRO version and free version, includes various features that may not be immediately visible. In the following series about tips and tricks, I would like to take a closer look at some of them and demonstrate them through examples. So let’s get started and explore more tips and tricks for Elementor #5.
1.) Dark and Light Interface Themes
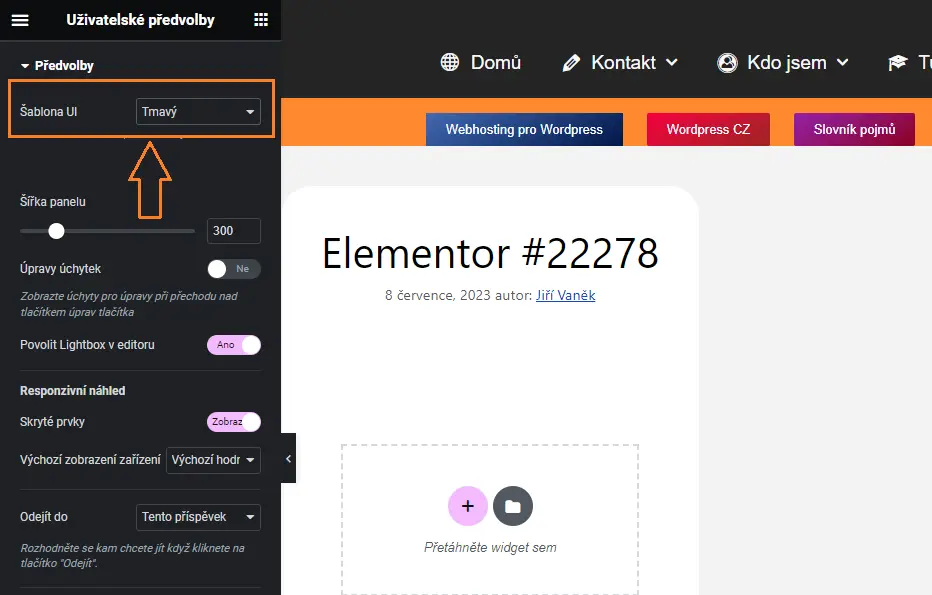
In Elementor, you can change the interface theme to either dark or light. The dark theme is designed with dark gray colors, while the light theme is entirely white. Personally, I only use the dark theme, but you can choose according to your preferences. You have three options: dark, light, and automatic. The automatic option adjusts the theme based on the conditions set in your operating system.
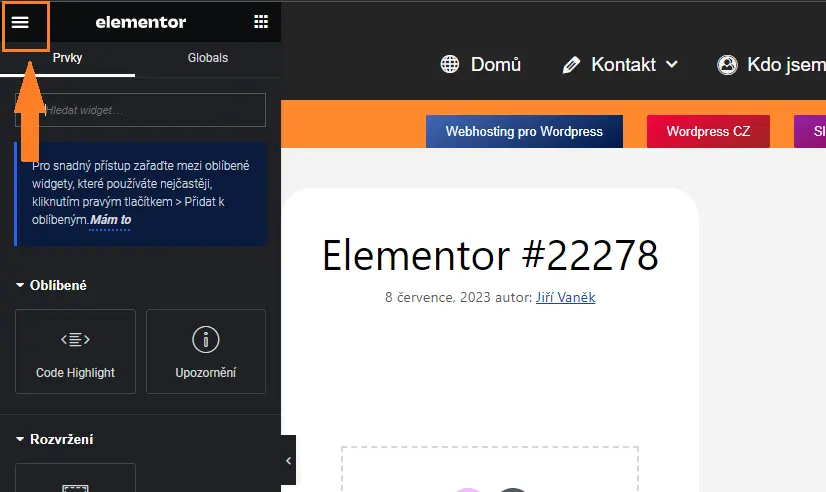
- In the top-left corner, click on the global settings using the “hamburger menu“.
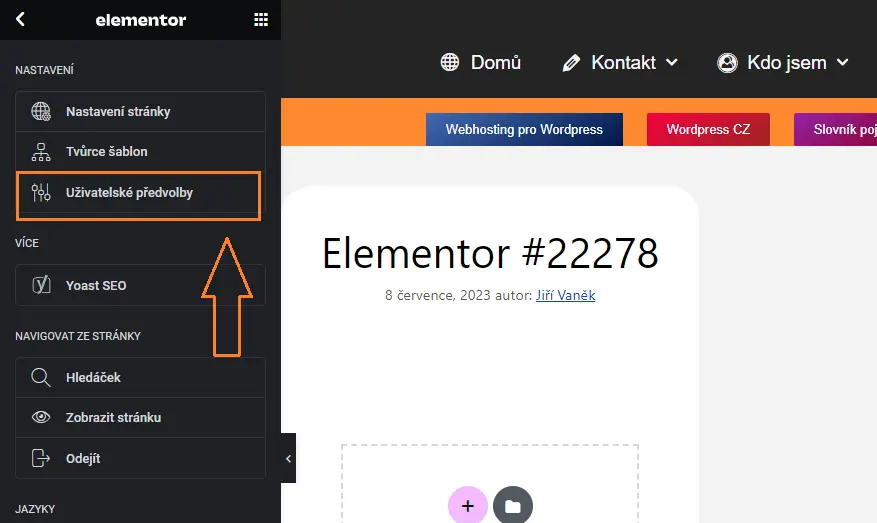
- Choose the “User Preferences” option.
- Using the “UI Theme” selection, choose the desired interface theme.
2.) How to Place Buttons Side by Side
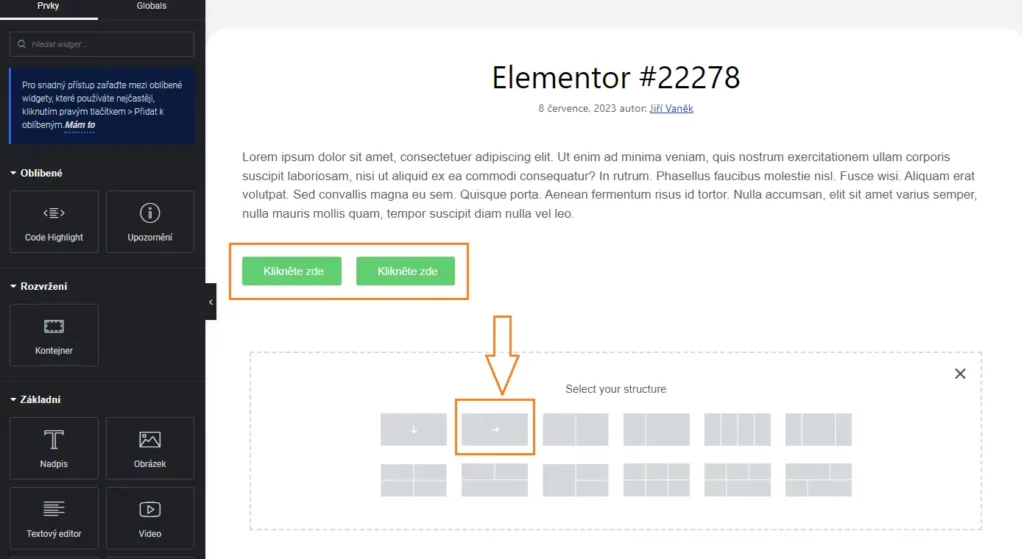
By default, when you insert two buttons into an article, they are stacked on top of each other. Let’s take a look at how to place them side by side. In order to align the buttons next to each other, Elementor uses a feature called the “column direction” (this wasn’t possible before). You need to create a new section for the buttons and choose the appropriate column direction. Instead of downwards, select the sideways direction. This way, the buttons will be arranged side by side, rather than vertically and below each other.
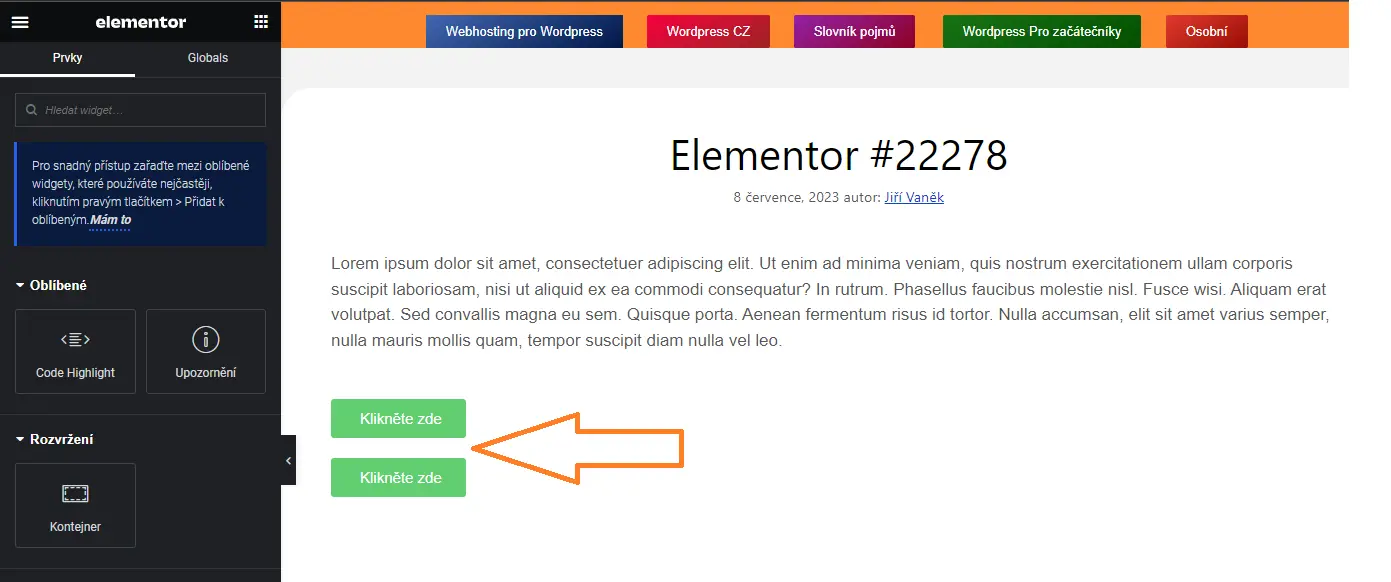
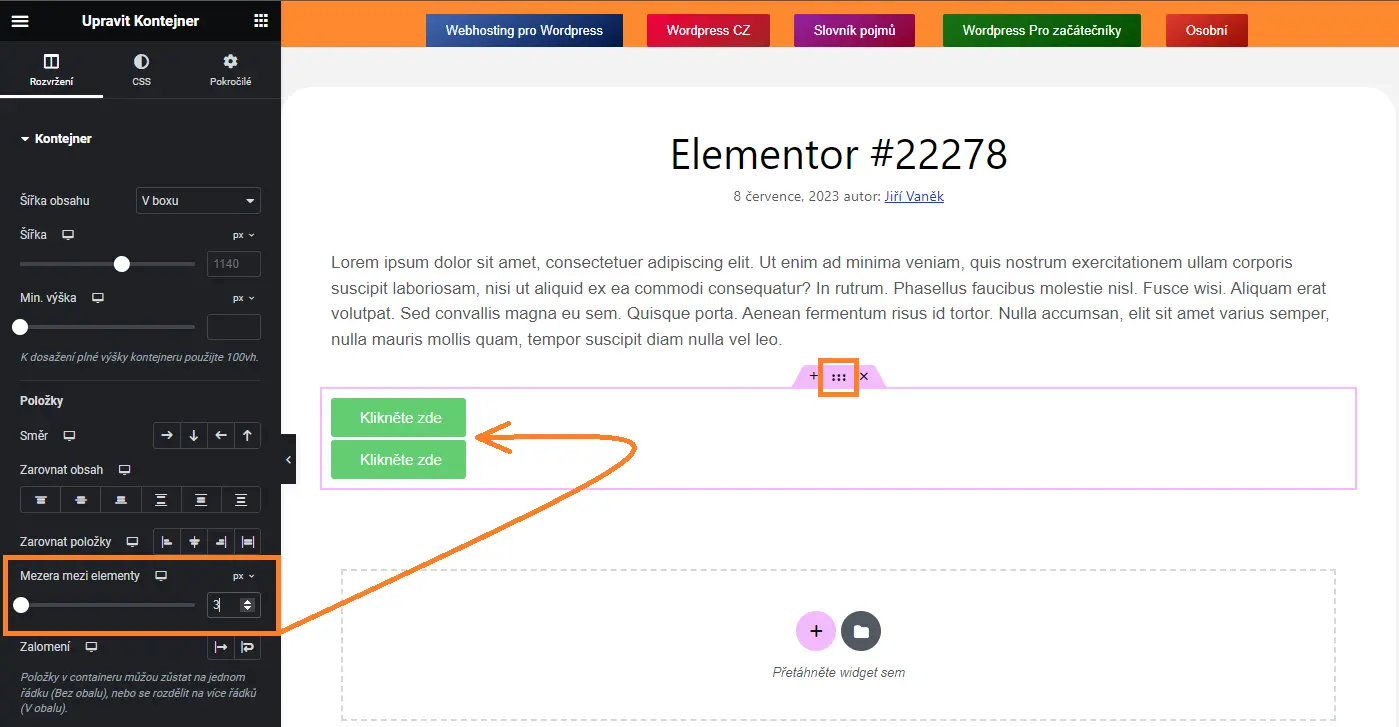
3.) How to Decrease or Increase Gaps Between Widgets
Widgets in Elementor have a default gap set to a value of 20. This gap determines the spacing between Widget 1 and Widget 2 in a row. However, sometimes you may need to decrease this gap. Let’s demonstrate this situation again using two buttons. This time, we will place them below each other and try to decrease the default gap to bring the buttons closer together.
- Start by clicking on the button to edit the container.
- In the left menu, select the first tab.
- Choose the “Space Between Elements” option.
- Adjust the value to your desired setting.
The website is created with care for the included information. I strive to provide high-quality and useful content that helps or inspires others. If you are satisfied with my work and would like to support me, you can do so through simple options.
Byl pro Vás tento článek užitečný?
Klikni na počet hvězd pro hlasování.
Průměrné hodnocení. 0 / 5. Počet hlasování: 0
Zatím nehodnoceno! Buďte první
Je mi líto, že pro Vás nebyl článek užitečný.
Jak mohu vylepšit článek?
Řekněte mi, jak jej mohu zlepšit.

Subscribe to the Newsletter
Stay informed! Join our newsletter subscription and be the first to receive the latest information directly to your email inbox. Follow updates, exclusive events, and inspiring content, all delivered straight to your email.
Are you interested in the WordPress content management system? Then you’ll definitely be interested in its security as well. Below, you’ll find a complete WordPress security guide available for free.
