Table of Contents:
- How to add icons to WordPress menu using the Menu Image plugin
- Plugin installation
- Adding icons to WordPress menu using the Menu Image plugin
- How to create a new menu in WordPress?
- Conclusion
- More content about WordPress
Last updated December 6th, 2023 00:27
If you’re creating a website using the WordPress content management system, you’ve probably already realized that the menu is a key element of the whole page. With the menu, you can easily direct website users to the main pages of your website and provide them with important information. This can be a price list, contacts, or information about who you are and what you do. The menu usually applies mainly to pages, as posts have their own taxonomy, usually located in the right or left panel of the website. In this article, I would like to show you how to add icons to WordPress menu using the Menu Image plugin. It is very simple, and the main benefit is that loading icons is much faster than using Font Awesome.
How to add icons to WordPress menu using the Menu Image plugin
I had the idea of adding icons to the menu since the beginning of my blog. I implemented the first icons using a very well-known plugin and a set of free icons through Font Awesome. After several performance tests on the website, I found that Font Awesome significantly slows down the website and worsens the results in many metrics. In the end, I removed Font Awesome and also disabled it using code in the function.php file.
For this reason, I continued to try another system that adds icons to the menu but does not slow down the complete loading and response of the website. The Menu Image plugin fulfilled this quite well.
Plugin installation
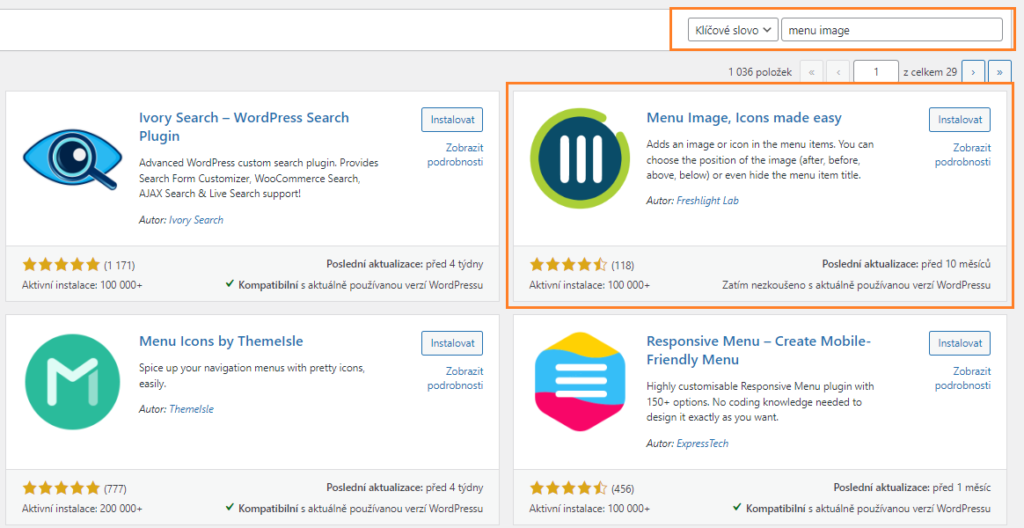
The Menu Image plugin is located in the official WordPress repository, and you can easily install it from the administration environment. In the left menu, go to “plugins” and then click on “add new” in the submenu. In the top right corner, use the search to find the Menu Image plugin. Install it and then activate it.
Adding icons to WordPress menu using the Menu Image plugin
That’s half of the work done. Now, you need to navigate to the “Appearance” option in the left-hand menu of your WordPress dashboard, and then click on “Menu“. Here, you will select the menu that you want to modify using icons. Please note that you need to have a basic menu of created pages or links ready or create it using the standard method (see below).
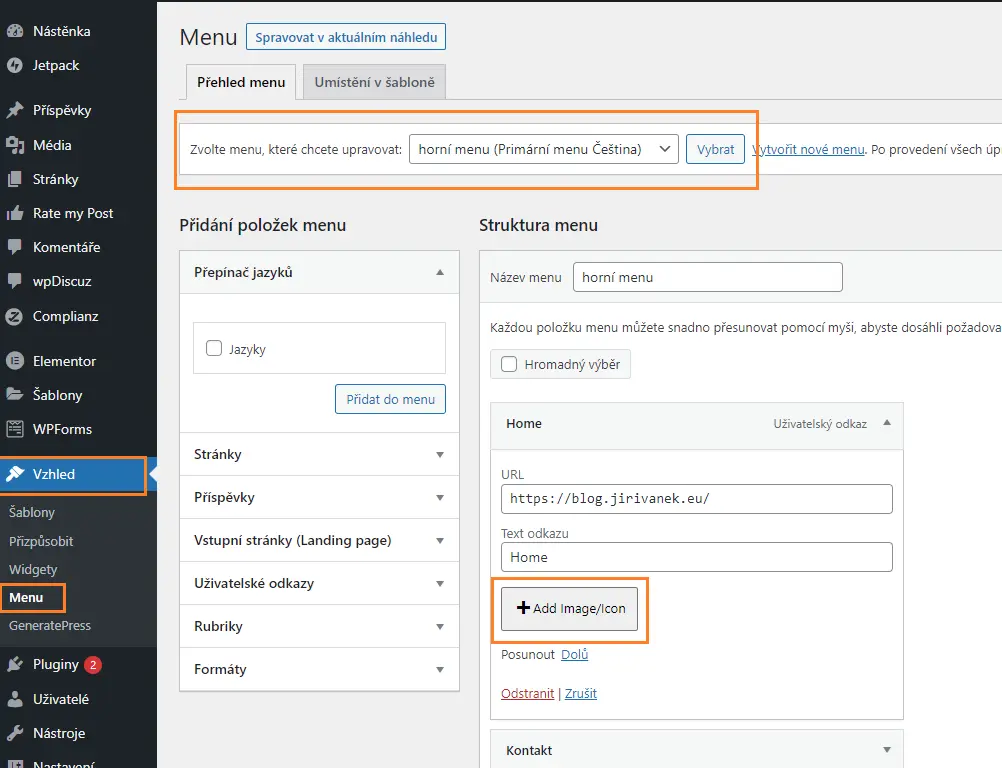
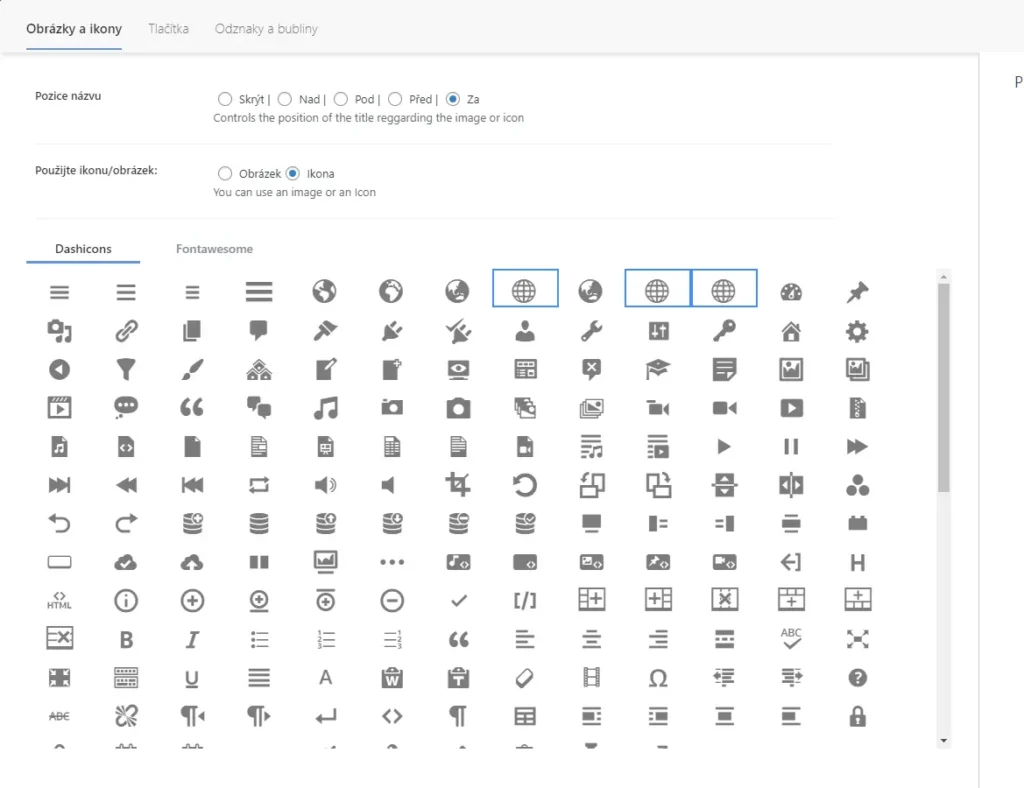
In each menu item, after expanding it, you will now also see a field for adding an icon (+Add Image/Icon). In the next step, you have two options. You can use your own image as an icon, or you can choose an existing icon from the provided set. If you choose to select an existing icon, the plugin will offer you a list to choose from. Simply click on the icon you want to use and save the changes.
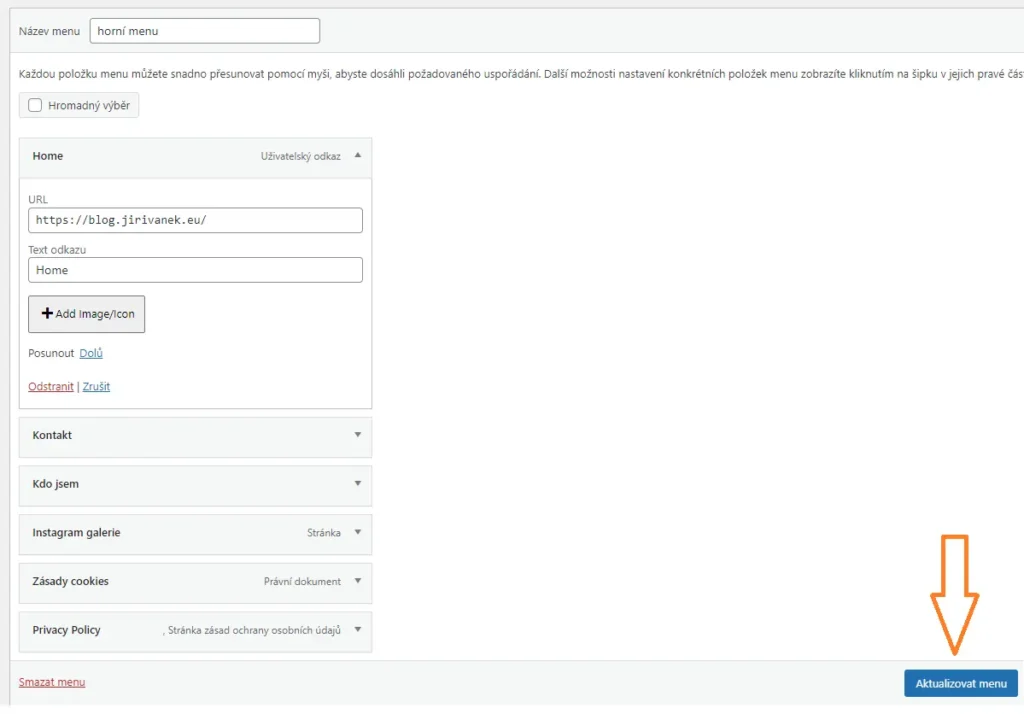
Once you have the entire menu ready and icons added to all items, you need to update the menu. You can do this by clicking the “Update Menu” button in the bottom right corner. Once WordPress saves the changes, you can check the display of the icons in the main menu on the website. Note that if you have a cache plugin active on your website, you will need to clear the cache to see the changes reflected on the website.
How to create a new menu in WordPress?
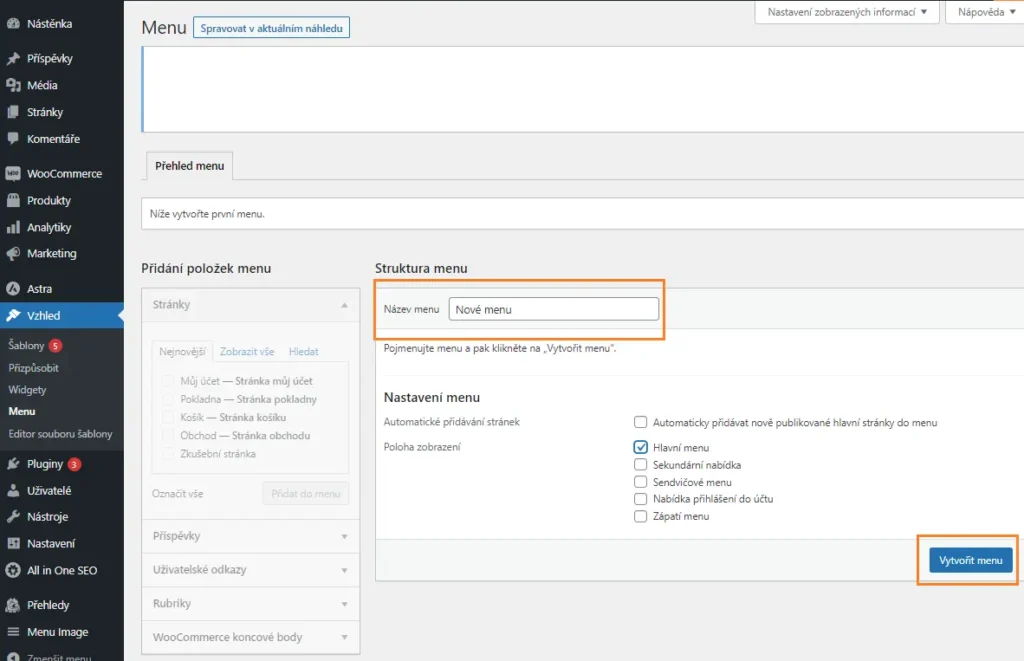
You can create a menu easily by clicking the “Create menu” link, as shown in the image below. The following items can be added to the menu:
- Pages – contains a list of already created pages
- Posts – displays a list of all added posts on the website
- Custom Links – in this section, you can add any external or internal link. Alternatively, you can add an anchor link using the # symbol.
- Categories
- Tags
- Formats
- Woocommerce items
- Custom (depending on installed plugins)
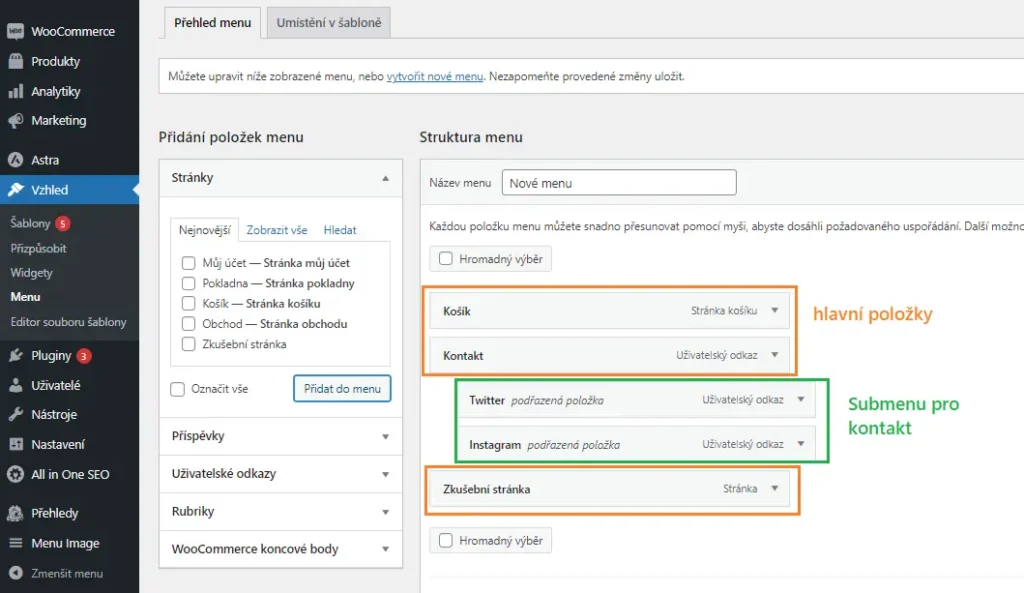
You can also assign positions to the added items, i.e., whether a particular item will be first, second, third, etc., in the list. You also have the option to create submenus. This means adding items to individual main categories, which will then expand into a separate submenu on the website. For example, the main item could be “Contact Us” for a link to a page with an address, phone number, and possibly a Google map or contact form. You can then add a link to Facebook, Twitter, Instagram, etc., to the expanding submenu.
Conclusion
The advantage of icons in the menu using the Menu Image plugin is in speed. I tried several tests in a row and nowhere did I record any significant slowdown of the website. I didn’t see any lowering the results of the measured metrics. Unfortunately, this cannot be said for Font Awesome. Therefore, if you want to try graphic elements in your menu, you have the option to add them using this simple plugin, without significantly slowing down your website’s performance. However, even with this plugin, it is necessary to consider that any additional plugin has an impact on the overall operation of the website. If you already have a lot of plugins on your website, there may be a way out by manually adding icons using CSShttps://blog.jirivanek.eu/cs/en/css/. I will discuss this in another article if needed.
The website is created with care for the included information. I strive to provide high-quality and useful content that helps or inspires others. If you are satisfied with my work and would like to support me, you can do so through simple options.
Byl pro Vás tento článek užitečný?
Klikni na počet hvězd pro hlasování.
Průměrné hodnocení. 0 / 5. Počet hlasování: 0
Zatím nehodnoceno! Buďte první
Je mi líto, že pro Vás nebyl článek užitečný.
Jak mohu vylepšit článek?
Řekněte mi, jak jej mohu zlepšit.

Subscribe to the Newsletter
Stay informed! Join our newsletter subscription and be the first to receive the latest information directly to your email inbox. Follow updates, exclusive events, and inspiring content, all delivered straight to your email.
Are you interested in the WordPress content management system? Then you’ll definitely be interested in its security as well. Below, you’ll find a complete WordPress security guide available for free.

